How do I print user badges onsite?
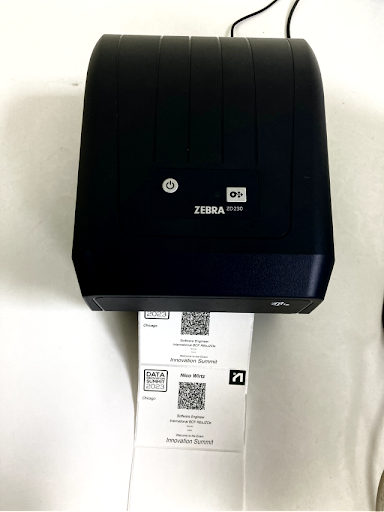
When it comes to printing user badges onsite, Eventify offers a convenient solution by assisting with badge design. With Eventify, you can effortlessly print badges using a normal printer or two integrated printers: Wi-Fi based Brother Label Printers or Zebra Desktop Printers with an Ethernet or Wireless communication, ensuring smooth badge printing for your event attendees.
If you are using a normal printer:#
In case you are using a normal printer, you can download and print the badges from two places:
Badge Design#
Go to User Management > Badge Design and select the badge you want to print.
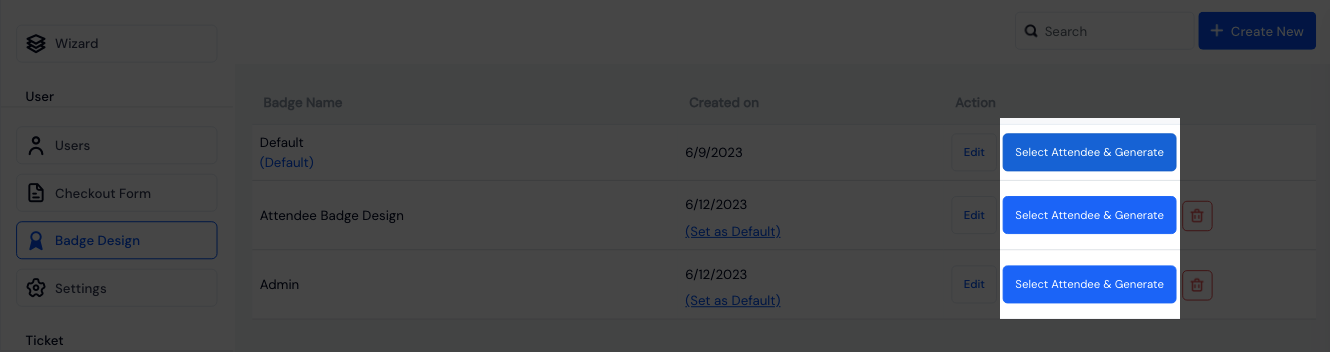
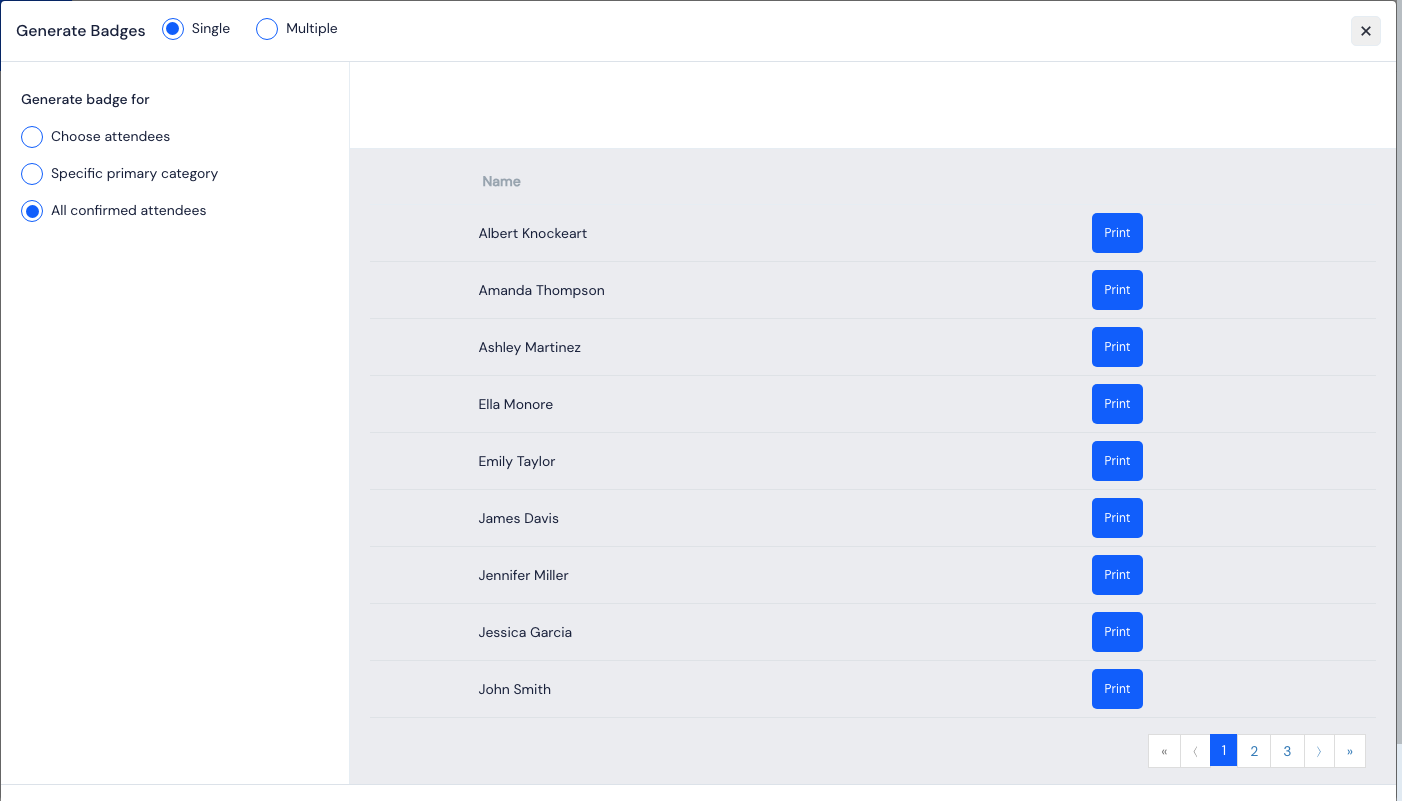
The first option you will get is Single and Choose attendees. Single here means one badge per page.
You can search and select the attendees to whom you want to assign this badge design. All the badges will be generated for individual selected attendees in a pdf file, with the pages sized and formatted as set in the badge design which you can then print and distribute.
Instead of search and select, you can also choose to select a group of attendees from Select primary category or All confirmed attendees
The second option is to generate multiple badges in a single page. Multiple here means multiple badges will be printed on a single page.
You can select the Page size from the predefined set of page sizes or set a custom page size depending on what your printer supports. You can also set the padding and spacing of the badges so that the cutting process can be made easier.
Rest of the attendee selection steps is same as in Single page selection.
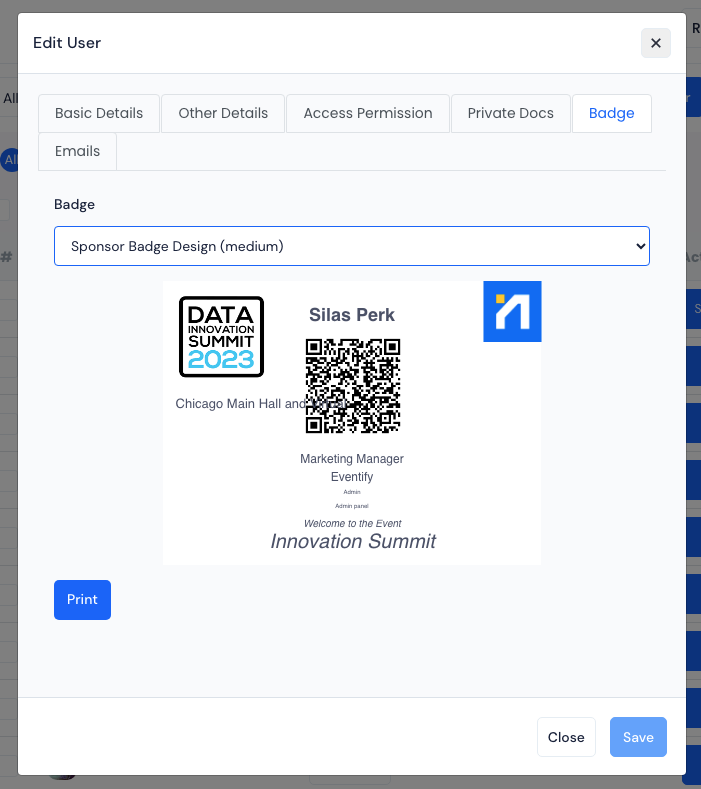
Edit User#
Go to User Management > Users > Edit User > Badge in case you want to downlaod badge for a single user.
Click on the Print option to downlaod the badge which you can then print and distribute.
If you are using an inetgrated printer:#
Depending on which printer you will be using follow the set up steps:
Once the setup is done, follow the following steps:
For both Brother Label Printers and Zebra Desktop Printers
Log in to the Eventify iOS application with admin access.
Go to Admin Dashboard and select the Kiosk Mode.
You will be prompted to download the attendee database. Download it again in case new attendees are added in between the set up time and scan time for being able to transfer proper data to the printer.
Once the database is downloaded, you can start scanning.
In the Kiosk Mode, attendees can self-scan their profile QR codes to obtain the printed badges.
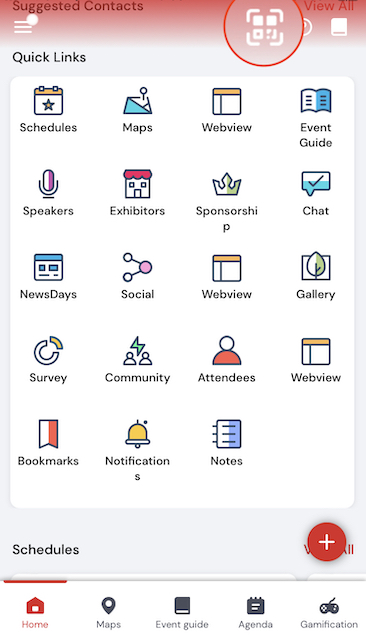
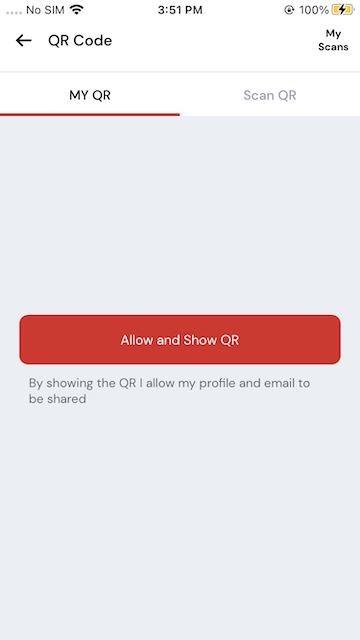
Attendees can find their QR in the Home screen of the apps.
It needs to be set to Allow and Show QR to display the QR.
That QR needs to be scannned on the admin app's QR scanner.
The scanner will display the QR code for verification, and you can proceed with the Print option to generate the badges.
Badges will be auto printed if Auto Print is set on or you will have to tap on Print to start printing.